Discover the WhatsApp for web3: end-to-end encrypted messages between wallets, that only you own and can take with you anywhere.


Discover the WhatsApp for web3: end-to-end encrypted messages between wallets, that only you own and can take with you anywhere.
With Notifi, XMTP in-app messages can now trigger notifications to any web2 app, so devs can reliably reach their end-users without compromising on security.
This post may be out of date. See the Attachments tutorial for the latest guidance on how to build attachments.
Let's talk about some new content types for XMTP.
What's a content type? A content type is a way to describe the type of content a message contains on XMTP. Out of the box, XMTP's SDKs support one content type: text.
Here's the thing though: messaging has been more than just text since way back in 2002, when your LG VX8100 was blowing up from MMS.
So we decided to propose some new content types: Attachment and RemoteAttachment. These new content types support rich media (images, videos, gifs, etc.) and will let you bring your messaging experience to the cutting edges of the early aughts.


If you’ve been in the web3/crypto community for longer than an hour, you’ve probably seen a strange message that seems to accompany every Discord server. Something that looks like this:


Next Video Build: Livepeer x XMTP awards wrap-up: DeUniversity’s education platform, Polyfans Messenger token-gated livestream, and Livopedia’s creator tools take top honors.


Announcing XMTP Grants! A program to nurture web3 messaging projects, support public good creation, and foster ecosystem growth.


This holiday season, we have an early gift for all the web3 developers out there. Our mobile SDKs are now available in Developer Preview 🧑💻
The latest version brings conversation filtering and improvements to privacy.


When building with XMTP, a conversation comprises a set of messages exchanged between two participants. These participants are identified solely through their wallet addresses.
Web3 is founded on values such as decentralization, portability and ownership. These principles allow users to maintain multiple pseudonymous identities. The idea is that users should be able to possess multiple identities, switch between them as they please, display varying information, and interact with different individuals.
In the context of the Lens Protocol, each identity is represented as a Profile NFT. Given that the core values of Lens are permissionless and portable, you can hold multiple profiles or identities and use them across different applications and platforms.
Because an address can hold multiple profiles and there are address-based interactions such as follow or collect, the default profile variable allows the owner to select one profile as their default. This functionality gives interfaces the ability to shape how such interactions are displayed based on the default profile, rather than just an address. Read more
When building with XMTP, you must provide a way to start a conversation between the user and the wallet address they want to message.
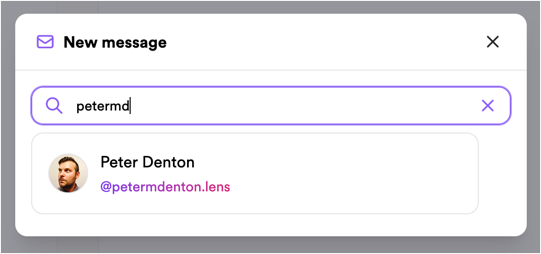
For a Lens app, you want to enable the user to start a conversation with a Lens profile only.
Here is the New message modal in Lenster, providing a field where users can search for the Lens profile they want to message:
lens.dev/dmconst PREFIX = "lens.dev/dm";
const buildConversationId = (profileIdA: string, profileIdB: string) => {
const profileIdAParsed = parseInt(profileIdA, 16);
const profileIdBParsed = parseInt(profileIdB, 16);
return profileIdAParsed < profileIdBParsed
? `${PREFIX}/${profileIdA}-${profileIdB}`
: `${PREFIX}/${profileIdB}-${profileIdA}`;
};
conversationIdBuilding multi-profile experiences is optional. Allowing users to have different conversations with multiple profiles can make the experience inconsistent outside the Lens ecosystem.
You can assign a conversation ID to conversations and then use the ID to filter and organize conversations as needed. You set the conversationId when your app creates a conversation.
const conversation = await client.conversations.newConversation(
  otherProfile.ownedBy,
  {
    conversationId: buildConversationId(myProfile.id, otherProfile.id),
    metadata: {},
  },
);
await conversation.send("gm");
let conversation2 = try await client.conversations.newConversation(
with: "0x3F11b27F323b62B159D2642964fa27C46C841897",
  context: .init(conversationID: buildConversationId(myProfile.id, otherProfile.id),
  metadata: ["title": "Bar conversation"]
)
)
let conversation1 = try await client.conversations.newConversation(
with: "0x3F11b27F323b62B159D2642964fa27C46C841897",
context: .init(conversationID: buildConversationId(myProfile.id, otherProfile.id))
)
val conversation2 = client.conversations.newConversation(
  "0x3F11b27F323b62B159D2642964fa27C46C841897",
  context = InvitationV1ContextBuilder.buildFromConversation(
    conversationID: buildConversationId(myProfile.id, otherProfile.id), metadata = mapOf("title", "Bar conversation"))
)
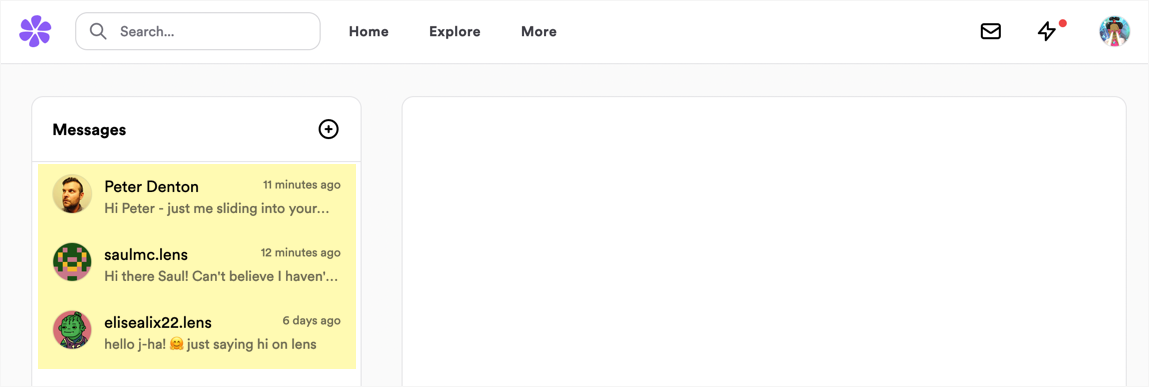
Now that you've built the Lens DM conversationId for your Lens app, your app can use it to filter and organize Lens conversations. For example, you can use the Lens DM conversation ID as a filter to provide a UI in your app that displays Lens conversations only. This section describes how to filter for Lens conversations and then display their message previews.
Here is the Messages panel in Lenster using the Lens DM conversationId to filter and display a user's Lens conversations only, along with message previews:
To filter for Lens conversations and then display messages in a conversation:
// Filter for Lens conversations with your profile
const myProfileConversations = lensConversations.filter((conversation) =>
  conversation.context?.conversationId.includes(myProfile.id),
);
// Get all the conversations
let conversations = try await client.conversations.list()

// Filter for the ones from your app
let myAppConversations = conversations.filter {
  guard let conversationID = $0.context?.conversationID else {
    return false
  }

  return conversationID.hasPrefix("lens.dev/dm/")
}
// Get all the conversations
var conversations = await client.listConversations();
var myConversations = conversations.where((c) =>
  c.conversationId.startsWith("lens.dev/dm/"));
// Get all the conversations
val conversations = client.conversations.list()

// Filter for the ones from your app
val myAppConversations = conversations.filter {
    val conversationId = it.context?.conversationId ?: return@filter false
    conversationId.startsWith("lens.dev/dm/")
}
const conversationKeys = myProfileConversations.map((convo) =>
  buildConversationKey(
    convo.peerAddress,
    convo.context?.conversationId as string,
  ),
);
const profileIds = conversationKeys.map((key) => getProfileFromKey(key));
The result is used to show information about the user and to verify that the profile is still owned by the account associated with the conversation.
/** Get the Lens profileIds from each conversationId and map them to the
conversation peerAddress. This allows us to ensure the profile still belongs
to the person in the conversation since profiles can be transferred. */
const conversationKeys = myProfileConversations.map((convo) =>
  buildConversationKey(
    convo.peerAddress,
    convo.context?.conversationId as string,
  ),
);
const profileIds = conversationKeys.map((key) => getProfileFromKey(key));
const [messageProfiles, setMessageProfiles] = useState<Map<string, Profile>>()
const getProfiles = gql`
  query GetProfiles($profileIds: [String]) {
    profiles(request: { profileIds: $profileIds }) {
      items {
        id
        ownedBy
        # Optionally add more profile information here
      }
    }
  }
`
const fetchProfiles = async () => {
  const response = await apolloClient.query({
    query: getProfiles,
    variables: { profileIds },
  });
  const profiles = response.data.profiles.items as Profile[];
  const newMessageProfiles = new Map(messageProfiles);
  for (const profile of profiles) {
    const peerAddress = profile.ownedBy as string;
    const key = buildConversationKey(
      peerAddress,
      buildConversationId(myProfile.id, profile.id),
    );
    newMessageProfiles.set(key, profile);
  }
  setMessageProfiles(newMessageProfiles);
};
fetchProfiles();
To see how starting a conversation with a Lens profile is implemented in Lenster, see createNewConversation in /src/components/utils/hooks/useGetConversation.tsx in the Lenster GitHub repo.
To see how Lenster uses the Lens DM conversationId to filter conversations, see listConversations in /src/components/utils/hooks/useMessagePreviews.tsx in the Lenster GitHub repo.
To view the getProfileFromKey helper method, see getProfileFromKey in src/components/utils/hooks/useMessagePreviews.tsx in the Lenster GitHub repo.
To see how Lenster implemented buildConversationKey, see buildConversationKey in src/lib/conversationKey.ts in the Lenster GitHub repo.
With XMTP, meTokens enables all creators to coordinate in a privacy-based manner that is simple enough to create widespread adoption.

